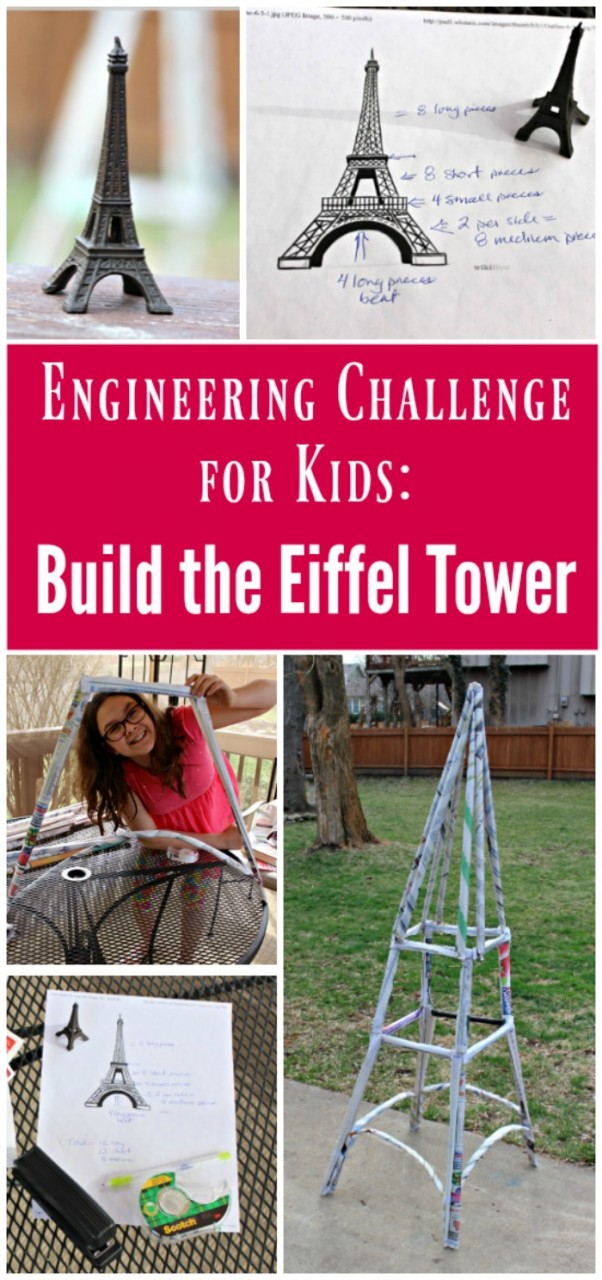
Challenge your kids to an engineering project by building the Eiffel Tower using newspapers!
This past week, I was looking for a fun engineering project for us to do over Spring Break.
Both of my kids loved to build with blocks and Legos when they were younger but as they got older, they were more impressed with ‘having a challenge’.
I think it’s really important to continue and offer kids various challenges that help them to ‘think outside of the box’ so to say. Most kids really enjoy creating and putting things together.
I wanted something that was a challenge but not too much of one (I mean, it was Spring Break — so kicking back was part of the plan 😉
And also something that would be ‘cool’ and grab their interest —
So one morning at breakfast, I said …
“What do you think about building the Eiffel Tower today?
Maybe one as big as you?“
And the eyes got as big as saucers 🙂
“What?!”
“That would be cool!”
“But how would we do it?”
And there it was …. challenge accepted!
How to Build the Eiffel Tower: An Engineering Project
One thing that I’ve learned with kids — they like to either create small projects (like this Greek God small world) or BIG stuff!
I thought about some of the past things we’ve built and was inspired by the newspaper geodesic domes that we did with the kids when the kids were smaller (and could crawl through it).
The domes are created out of newspaper rolls — a material that we have around the house all the time.
Sometimes it’s just as much fun to construct the building material as it is to put together the project 😉
So we decided we would construct our Eiffel Tower using newspaper!
I’m including a detailed tutorial for the project in addition to affiliate links for items that are very helpful to have as you build your own tower.
My daughter had doubts as to whether it would be strong enough to stand up on it’s own “if it’s made out of paper” so I knew this would be a great civil & structural engineering project.
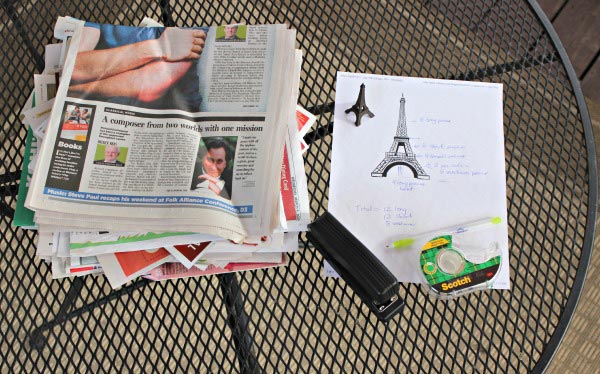
Here’s what you’d need —
- rolls of newspaper,
- a stapler
- a model of the Eiffel Tower
- and some tape.
Super simple!
The model of the tower is really important so you can examine it’s structure — try using of of these items as a miniature model:
- Eiffel Tower figurine from the Safari Ltd Around The World TOOB
(this is what we used)
- The LEGO Architecture Eiffel Tower
- Ravensburg’s Eiffel Tower 3D puzzle kit
You could also use these awesome Newspaper Connectors instead of staples (better for younger kids or if you use newspaper in your classroom).
You might also want some twine but you can read more about that below when we share our building lessons.
Oh, and a few books are always great for a project like this! Try —
Gustave Eiffel’s Spectacular Idea to learn the story behind how the tower was built
or DK Engineering! for learning about engineering concepts including those used to build the Eiffel Tower.
Engineering Design Process for Kids
First things first, we needed some design ideas.
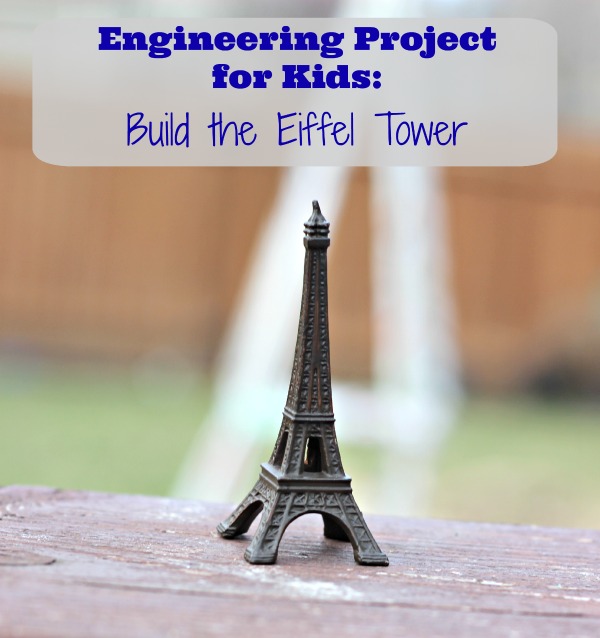
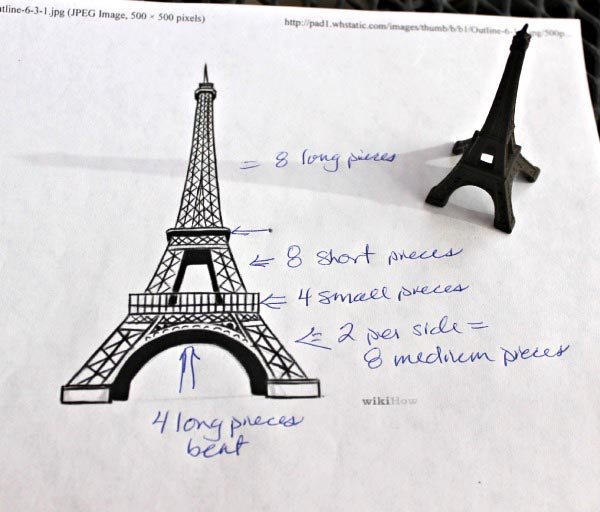
So we printed off an illustration of the Eiffel Tower and also grabbed our own Eiffel Tower figurine from the Safari Ltd Around The World TOOB.
Having the small figurine was very valuable since it was easier us to view the 3D nature of the structure.
We broke down our project into 3 sections: the upper (thin) part of the tower, the middle section and the lower section (or base).
For each section, we decided what size newspaper roll to use.
Let your kids do the math here — which turns this into a great STEM project too!
Ask them how many tubes you’ll need as you construct each section.
Don’t worry if they forget they are building a 3D structure — this is good practice for them as they think about building designs.
Constructing our Building Materials
Any sheet of newspaper can be rolled into three sizes —
- if you keep the paper folded, start from the short end and roll to the other short end, you’ll have a small piece (approx. 11 inches long)
- if you unfold the paper, begin with the long side of the paper and roll, you’ll have a medium strip (approx. 21 inches long)
- and if you begin at one corner and roll to the opposite corner, you’ll have a long tube of paper (approx. 27 inches long)
Using our design break-down, our final calculations showed that we would need:
- 12 long tubes (8 for the top section and 4 for the arched braces on the base)
- 12 short tubes (8 for the middle section and 4 for the rail connecting the base & middle)
- 8 medium tubes (all for the base)
So we got to rolling paper 🙂
The more hands you have, the quicker this gets done. It took us less than 30 minutes with just two of us rolling so it’s not that much work.
Here are a few photos —
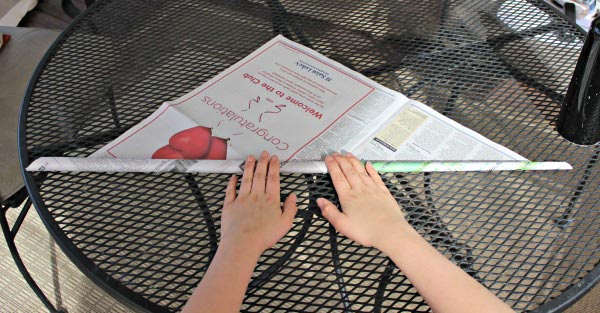
Rolling the paper diagonally so you’ll get a nice long tube (from corner to corner).
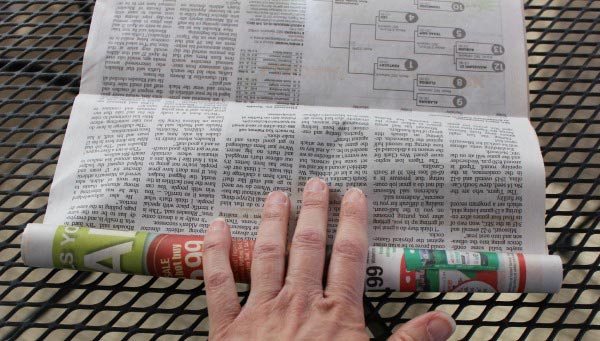
Rolling the paper for a short tube (beginning with an unfolded piece of paper and rolling from the short side).
Once we rolled each piece, we would secure it with a few pieces of tape either at the ends or at the middle (basically just tape that open part of the paper closed).
And this is what we had when we got through —
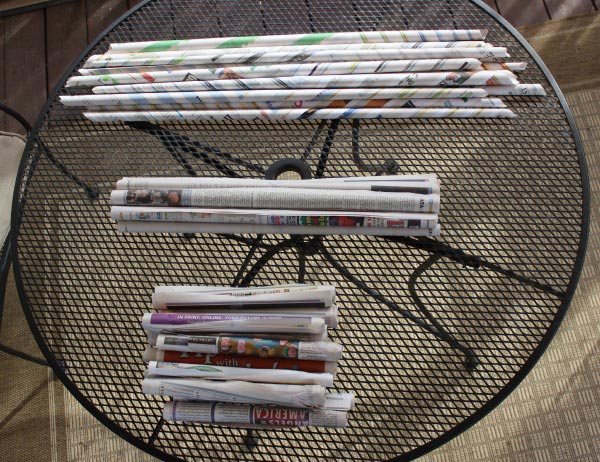
Here you can clearly see the various sizes of the paper when you roll it in different ways.
Building the Eiffel Tower
Time to get building!
We constructed the base first. For this, we attached two medium tubes to a small tube (at the top) using staples. We then folded a long tube to use at the arched support at the bottom and stapled it at the bottom of the medium tubes (so basically at the ground).
Once we put on the staples, we cover the area with a strip of tape — this was both for safety (no sharp metal staples as we worked) and for added support.
Again, be sure to read our “Building Lessons” below — for tips on what we would do different next time!
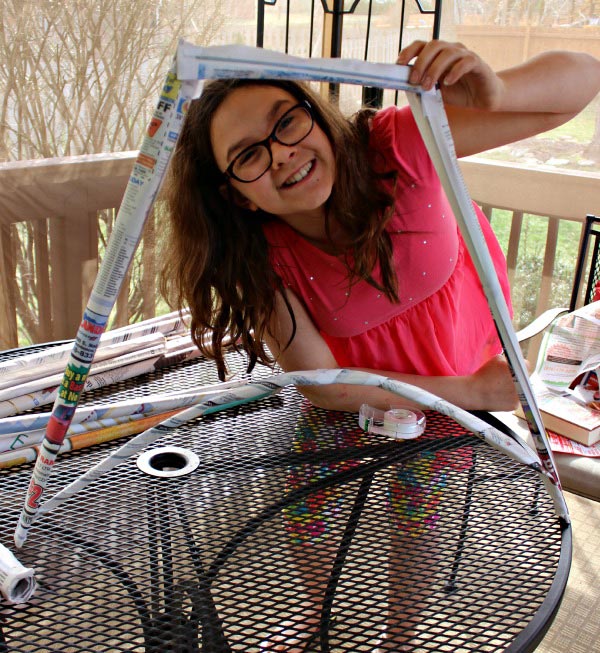
Peeking thru seems to be a step you shouldn’t skip over 😉
A few things the kids will notice right away —
Newspaper tubes are much stronger than sheets of newspaper.
The arched support is super important to the tower. You can have your kids try to stand the base up without the support piece but they’ll see how much things shift and move.
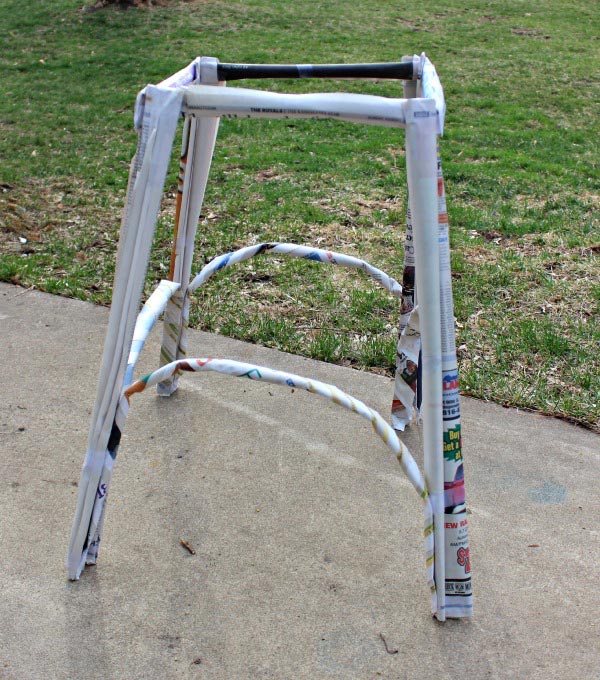
Once we had all four pieces constructed, we connected them by stapling them at the top and bottom corners.
We also taped over the staples at the top corner.
Now here’s where we reinforced our arched supports — once we had all four pieces together, we taped the arches around the leg of the tower about 5 inches from the bottom. This is key to getting the tower to stand & support the other sections!
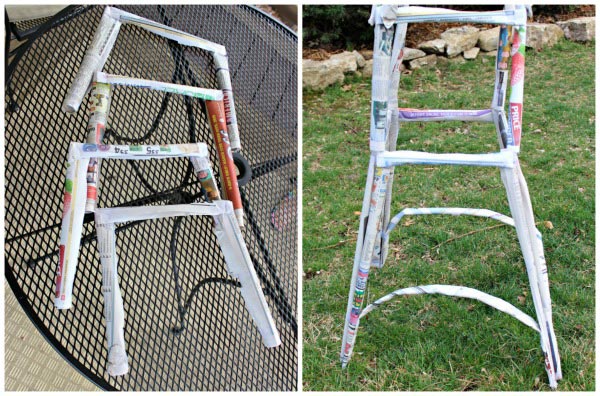
Next was the middle section which is where we used the rest of the small tubes.
Remember that the bottom of the mid section is also the top of the bottom section (wow! that’s probably as clear as mud 🙂 So you only need to make a 3-sided section (see the photo on the left above).
Once we had all four sides built, we attached them to the base by stapling and then taping them at the corners.
We were so excited to finish the top that I never got a picture of just the top section 🙂
Basically, you’ll want to connect the 8 top tubes so that you can have two coming down each side of your tower. So we stapled two tubes together and made four sections just like we did with the previous parts of the tower.
Then we connected those four sections at the top.
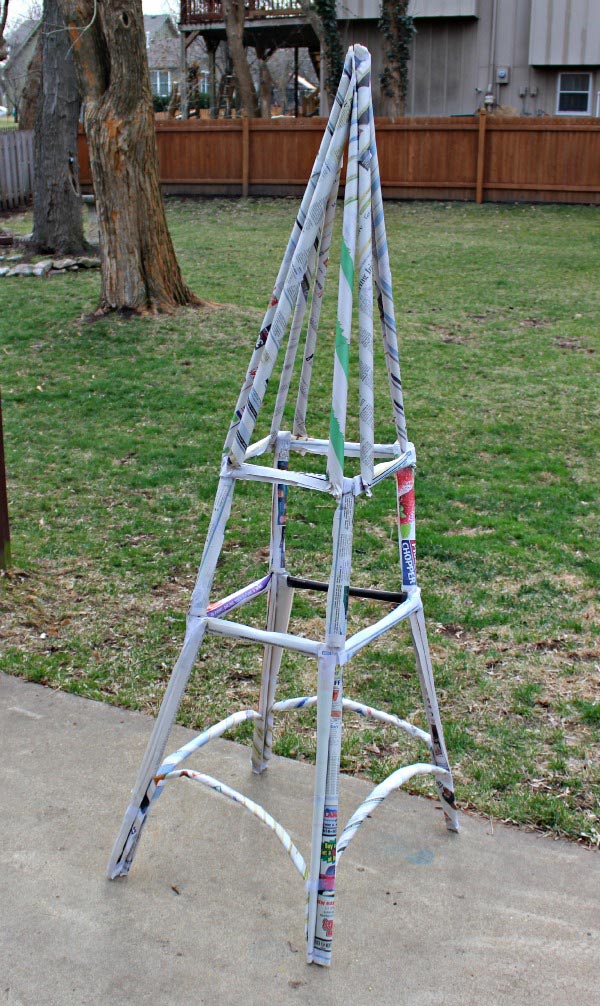
To put on the top section, staple each of the long tubes on either side of your middle corners.
Then we secured them with tape like the rest (and covered the staples).
TA-DA!
Your very own Eiffel Tower!
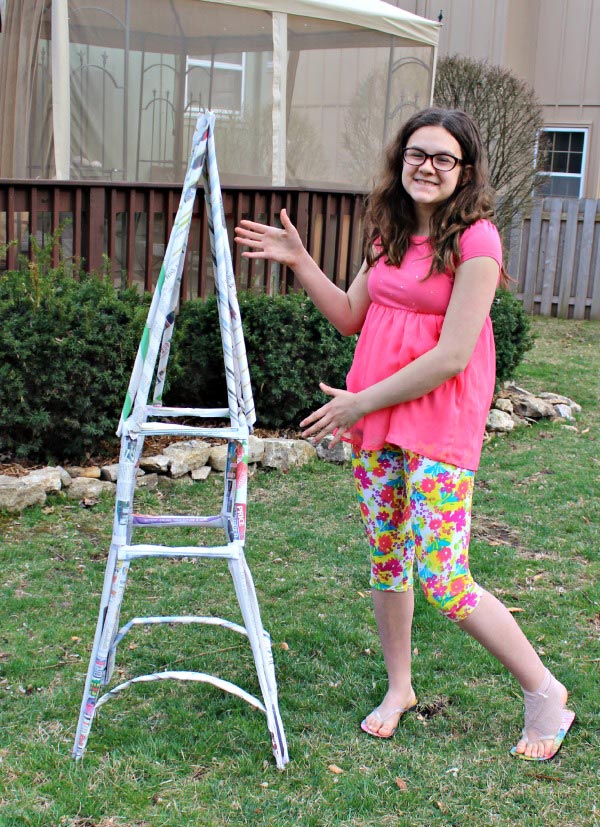
Final size?
Just shy of 5 feet tall 🙂
Building Lessons:
Since this was our first “make-it-up-as-you-go” build, we definately learned a few things!
1. NEWSPAPER FOLDING: We had three sheets of newsprint together before we rolled them into tubes. These were waaaayyyy to thick! The stapler wouldn’t even go through.
So we suggest using two sheets of newsprint for the long & medium tubes and just one folded sheet for the short sections.
2. CONNECTING SECTIONS: When connecting the middle section to the base, I think we would use twine to wrap around the corners for a stronger connection. Here’s an idea of what I mean — tying a square lashing.
3. CONSTRUCTING THE TOP: We would also use thin twine to secure the 8 pieces of the top section — in fact, if we tied them and then wrapped the twine around a few times, it would mimic the small deck that’s located at the top of the structure.
You might also enjoy these other 12 Building Materials You Can Create at Home.
OR refer to our Engineering Books & Resources if you’d like some books or websites on building.
MORE STEM ACTIVITIES FOR KIDS:
Build the Water Cycle with LEGOs
Construct the Layers of the Ocean: An Under the Sea Activity
15 Things to Build & Create Using Newspapers
