Learn how to build a sundial — a great STEM activity for kids!
For years I’ve been saying that it would be cool to have a sundial in the yard!
First, I operate by ‘sundial’ time more than by a clock — you know, the “it’s just about the right time” kind of time 🙂
Really this project came about because we’ve discussed sundials as being both a fun STEM activity and a connection to some of our history discussions (for my Greek-loving, Percy Jackson fan girl — she loves anything to do with ancient societies!) So we constructed a sundial for our back garden using natural items along with a little ‘pop’ of color!
DIY Sundial Clock for Kids
I’ll be the first to say this isn’t the perfect mathematical way to create a sundial — for that, you would need to do some really accurate measurements with degrees and latitude and such. Most kids won’t have the understanding or patience for this so our goal was really more of creating a hands-on learning experience with an ancient STEM tool.
In addition to the building details, we’re also sharing affiliate links for items we used for our project.


As with all of our projects, here are a few great books that will help kids understand the history and science of sundials:
Ancient Science: 40 Time-Traveling, World-Exploring, History-Making Activities for Kids which explores all types of cool ways that ancient societies used science!
About Time: A First Look at Time and Clocks gives kids a great historical perspective on how people used a variety of time-telling devices throughout the centuries. Sundials (of course) are featured.
And I love the Anno books for STEM topics but you may have to check out your library as they are an older series. Anno’s Sundial explains the Earth’s movements and how sundials work so it’s a perfect one to read with this activity!
How to Make a Sundial for Kids
Please note that this project has more of a STEM goal (build, discuss science, math and shadows) and is not really meant to be an accurate timekeeper like professional sundials. Once you create and mark your hours, the time-keeping should be somewhat accurate for a few weeks but then will change as the Earth’s tilt changes throughout the calendar year as it orbits the sun.
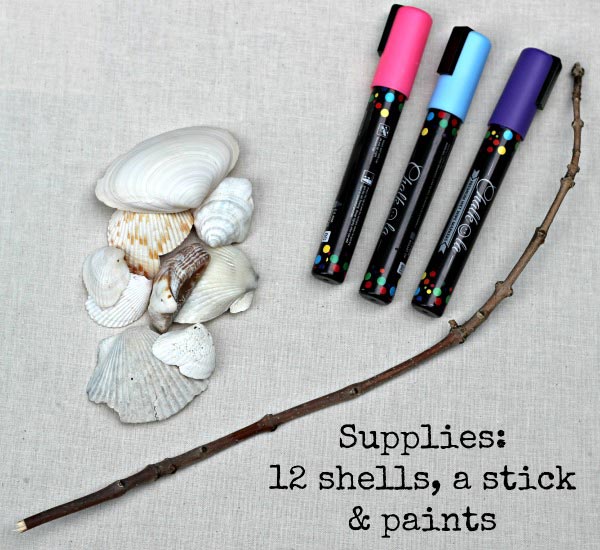
To build your own sundial, you’ll need the following supplies:
- a stick,
- 12 rocks or Sea Shells,
- some paint or markers (we used sea shells and decorated them with Chalk Markers)
- and a place in the yard that gets some sun!
You can go a few ways when decorating —
- the chalk markers aren’t permenant and will fade if it rains quite a bit HOWEVER if you have a kid like I do, that won’t bother them because it just means they’ll have the chance to draw in the numbers again 🙂
- If you want to use chalk markers or acrylic paints and NOT have to redo your numbers, use Mod Podge or Clear Nail Polish over the numbers once they dry and you’ll create a more water-resistant finish on your shells.
Step 1: Find a sunny area (preferably in a garden or flower bed) where you can build your sundial.
You’ll probably need a circular area that measures between 10 – 12 inches in diameter. I’m working on some fun kid-friendly additions to our back flower garden so we decided to put ours in this area.
Don’t go crazy if you can’t find a spot that has sun all day — we have a super shady yard so we just know that our sundial is covered by shade during part of the afternoon hours (which means if I’m using it for learning purposes, we head outside in the morning to check the time 🙂
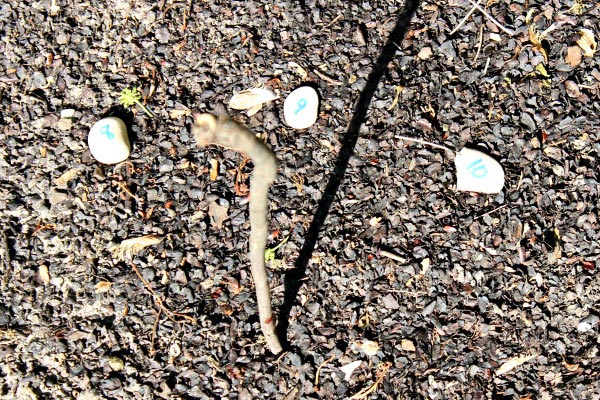
Step 2: Place one end of your stick into the ground so the opposite end points towards the sky.
The stick serves as the sundial’s gnomon and will cast a shadow. You’ll have to watch the stick’s shadow over the next few hours to see if you need to tilt it. Be sure to have your kids make a prediction about which way the shadow will move! Making predictions are one of the key ideas to building young scientists 🙂
The goal is when the sun is directly overhead at 12 noon, you want the shadow of your stick to be the shortest. We used a clock to time the shadown between 10 am and 1 pm to mark the point where the shadow was shortest on the circle.
If you read some of the books we recommended, you will learn that if your gnomon is tilted slightly North, that will make a more accurate timekeeper since the angle of the stick makes up for the tilt of the Earth we mentioned earlier.
Step 3: Once you find the shortest shadow, place a marker at that spot for 12 noon.
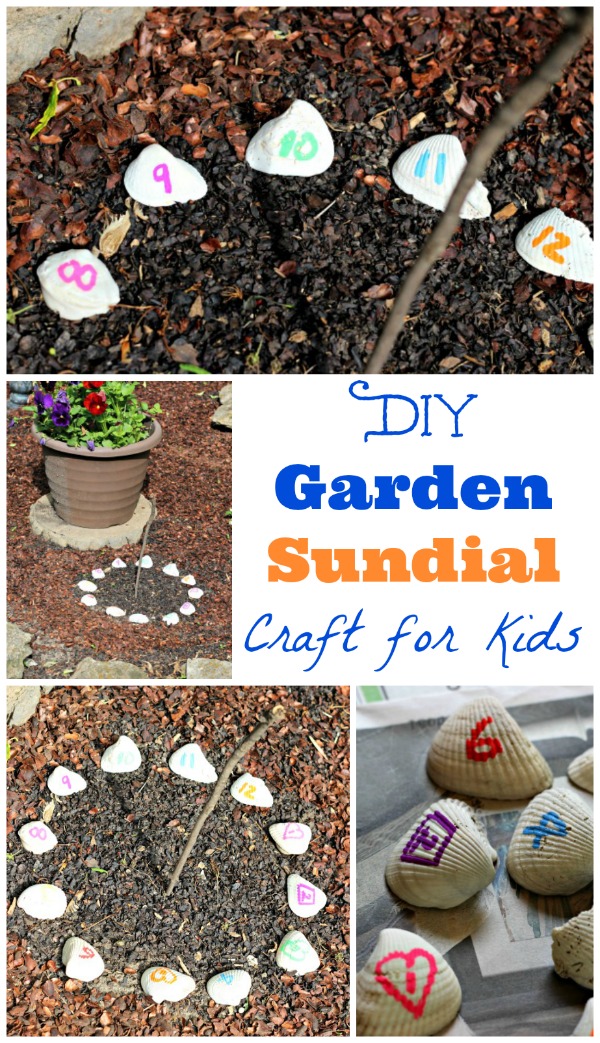
We took a few small rocks and numbered them to use as placeholders while we were timing our stick’s shadow and decorating our seashells.
Alternately, you could also use an actually clock to mark your sundial. For example, when your clock reads “9 am”, place a marker at the end of the shadow and label it with a 9.
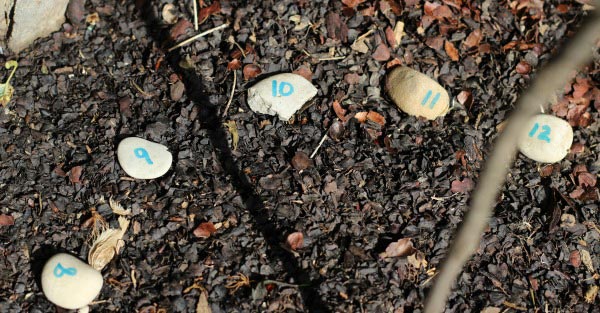
Step 4: Check the gnomon’s shadow to know how far apart your seashells or rocks will need to be spaced.
In theory, each rock or seashell would be equi-distance from the gnomon (in center of your circle) but that really will depend on the length of the shadow your stick makes and the area you have to build the sundial.
Also, you will probably see that your time markers will NOT be equal distance from each other (we talk more about this later and it’s explained well in a few of the books we recommended).
We found that we had to widen our circle — we began with an area that had a diameter of 8 inches and had to increase it to 10 inches in order for our shells to fit and not be too crowded.
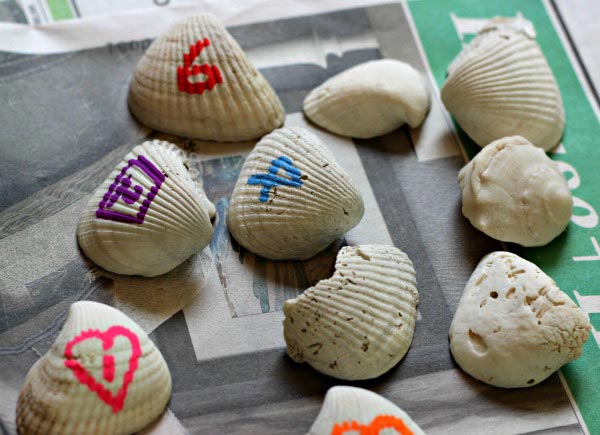
Step 5: Decorate your sundial’s seashells and write the numbers 1 – 12 on each one.
This is the fun part so give the kids time if they want to come up with a cool theme or style!
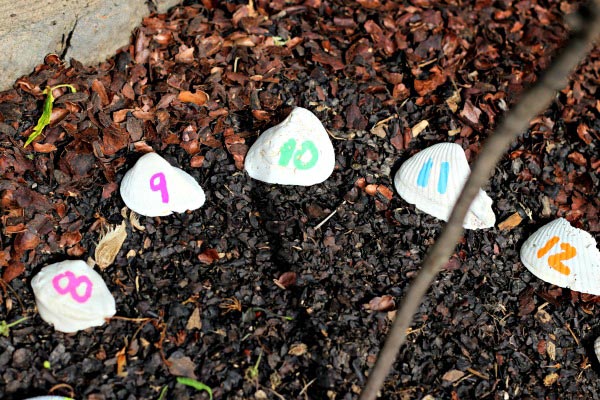
Step 6: Based on your markings (or place markers like our rocks), set up your sundial clock by placing the shells where the shadow falls on each hour.
Once we had our sea shells in place, we checked the sundial on various hours the next day to see how our clock was working. We had to adjust a few of our shells but overall, the sundial was pretty good at telling time during our morning and early afternoon hours!
Which means now the kids can run to the garden to see “what time it is” instead of constantly running into the house 🙂
More Tips for Building a Sundial
- We found that in the morning (10 am, 11 am) our shells were off by about 10 minutes. To adjust for this, you can try tilting your stick towards the North instead of moving the shells.
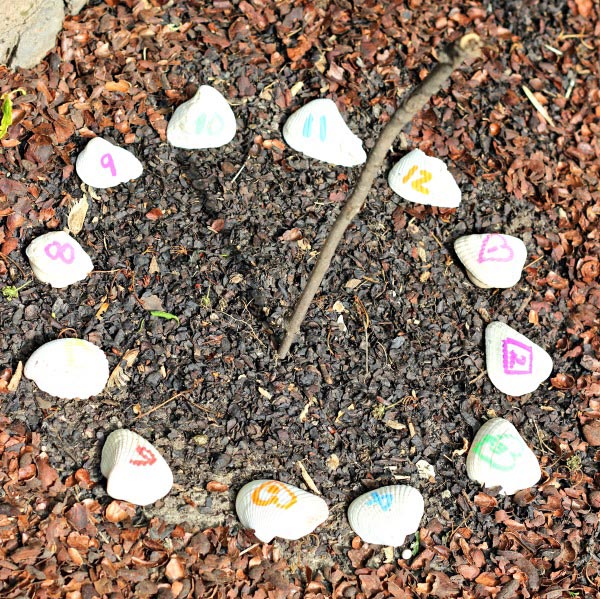
- Sundials are really NOT a perfect circle — if you were able to follow the light/shadow movement for an entire twelve hours or more, you would see that the hourly markers end up closer together as the day progresses. We were able to measure the shadow from 8 am thru 2 pm and then my daughter placed the other seashells along the curve of the circle.
- You can see the space between our 7 am, 8 am and 9 am hours is larger than the space between our 12 pm, 1pm and 2 pm hours. This is due to where we live (our latitude and distance from the equator).
- Be sure to talk with your kids as you observe the shadow moving — this is a great opportunity to introduce how the sun rises in the east, sets in the west and casts a shadow based on its position in the sky.
More Outdoor STEM Activities for Kids:
How to Turn Your Backyard into a Science Lab
STEM Activities in Your Fairy Garden
You can find a list of which experiments & activities we’re doing each day during the 31 Days of Outdoor STEM hosted by Little Bins for Little Hands.